The Geistenmunden Hills

It’s been a fair while between posts, over a month in fact! Over this period I’ve been on holidays and busy with work so haven’t had much time to get things painted, but I’ve still been chipping away in the background. Here’s something I’ve been working on for a little while: a set of terrain for the Geistenmunden Hills area of the Border Princes campaign map.

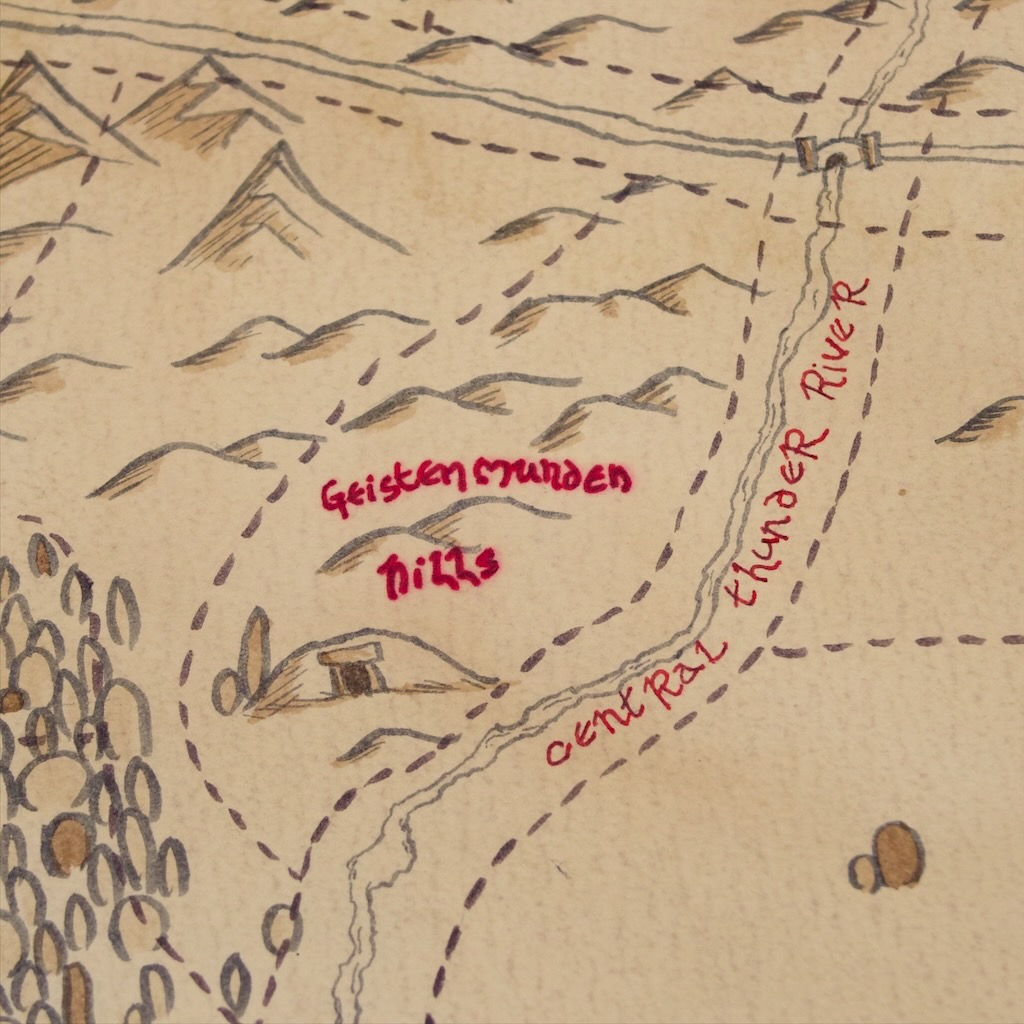
As you can see from the illustration, this is going to require some barrows! Luckily for me back over the Christmas break I’d ordered some terrain from https://www.fogoumodels.co.uk/ including a set of resin barrow entrances (well not so lucky, I ordered these for this very purpose!).

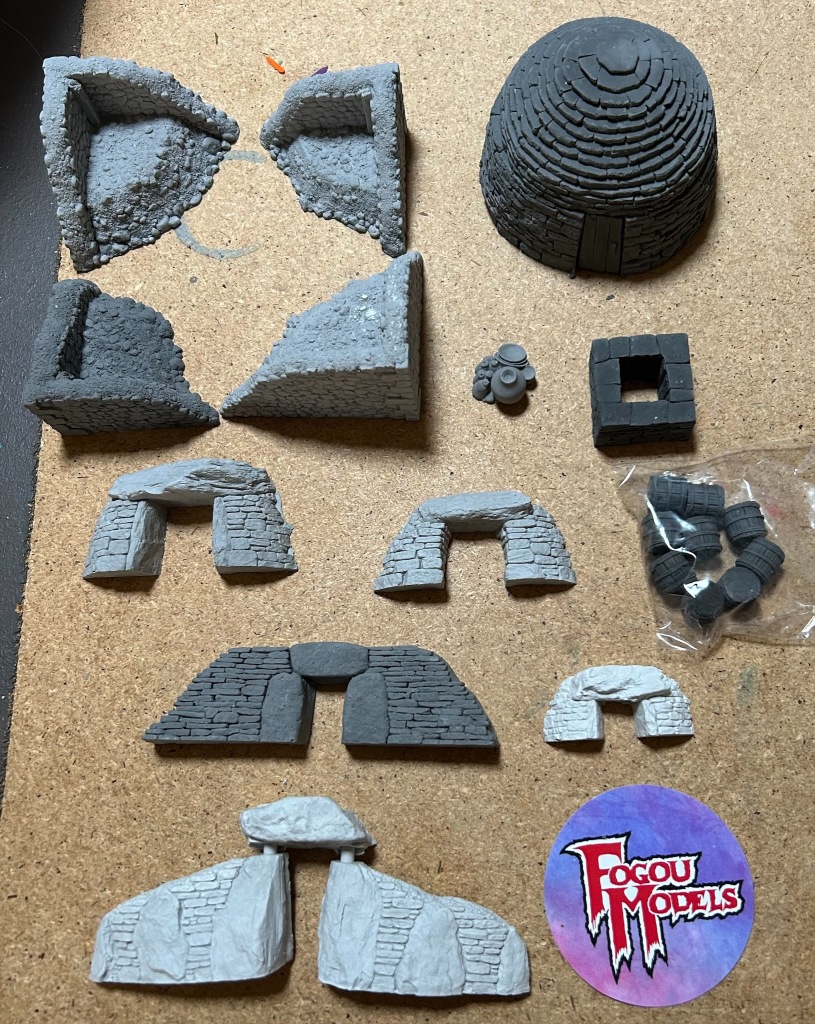
There are some other bits and bobs there that I’ll get to painting at some stage. Overall the quality of these models is excellent, the stone textures are really nice. I’d been waiting for an excuse to order from them for a while, and this was it!

Entrances are all well and good, but they need some burial mounds attached to them, and that’s what I busied myself at next. I took some photos of the process so I thought I’d make this post a bit of a tutorial.

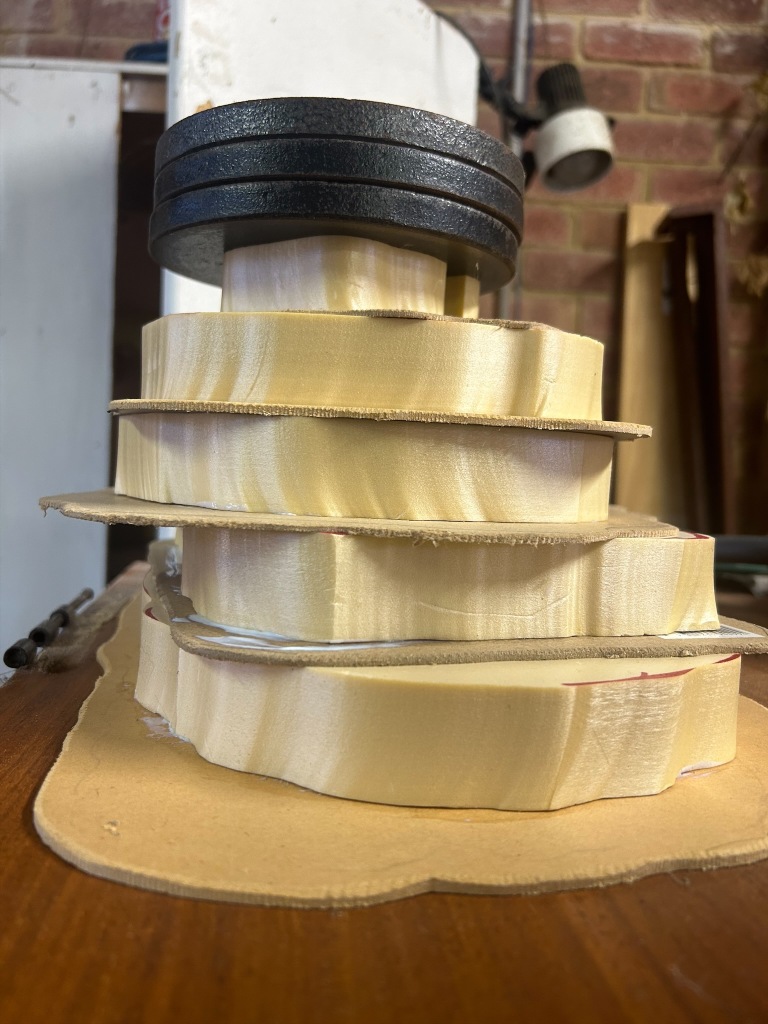
I started by cutting some rough shapes out of MDF for the bases and matching smaller shapes out of insulation foam to make the main shape of the hills. I also cut a notch out of each of the hills to make the tunnels behind the entrances. You can see said notch in the smallest hill at the top of the pile. I then covered the undersides of my foam shapes with PVA glue and glued them down, and weighed them down with some small weights.

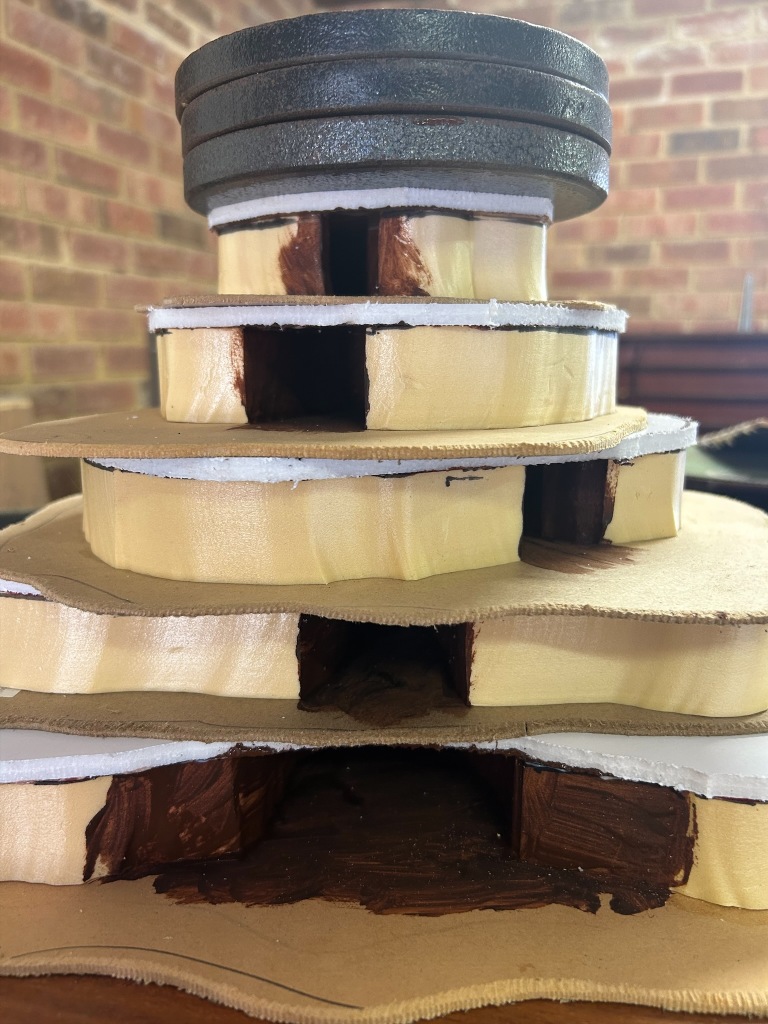
Next step was to put a roof on my hills. For this I used foamcore cut to match the hills. I also glued this down with PVA glue, but before I did this I painted my “tunnels” with some dark brown paint as I wasn’t going to be able to get to these once the entrances were glued on.

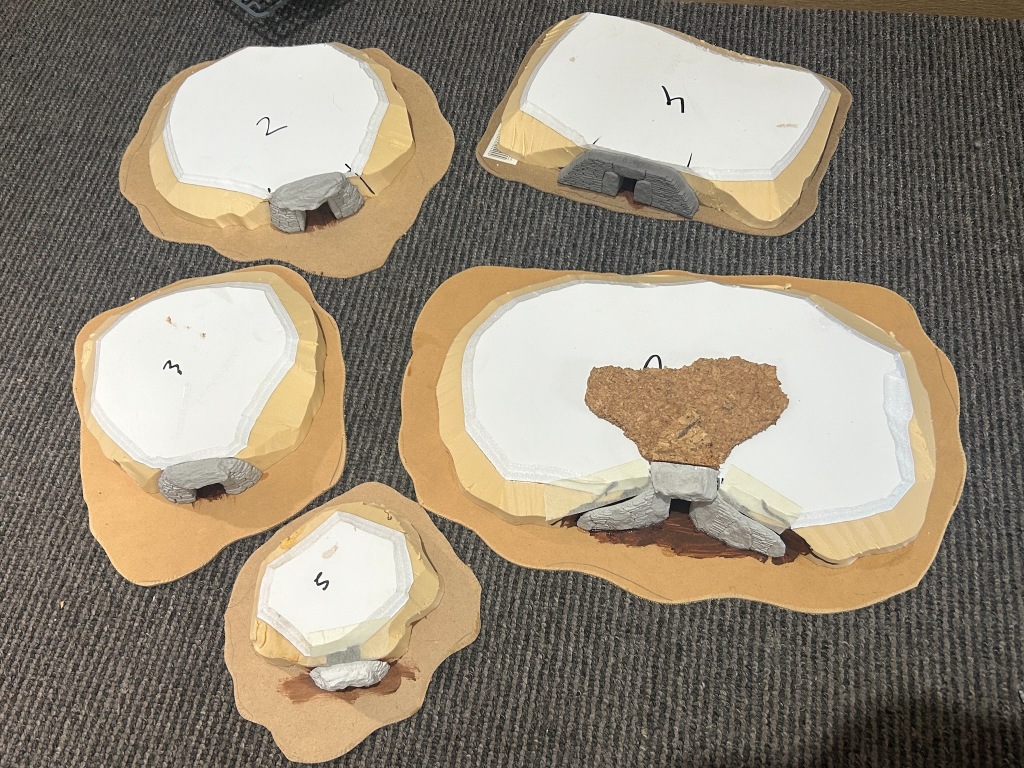
Once the glue was dry (read a few months later!) I carved my hills using a snap blade/retractable blade knife, with a special focus on making sure the entrances lined up neatly with my hills. For the big hill the entrance was taller than my foam assembly so I added some cork pieces to create a gradient to match the entrance. I used masking tape to patch any gaps, and glued the entrances down to the MDF using super glue (watch the foam doing this, super glue melts it!).

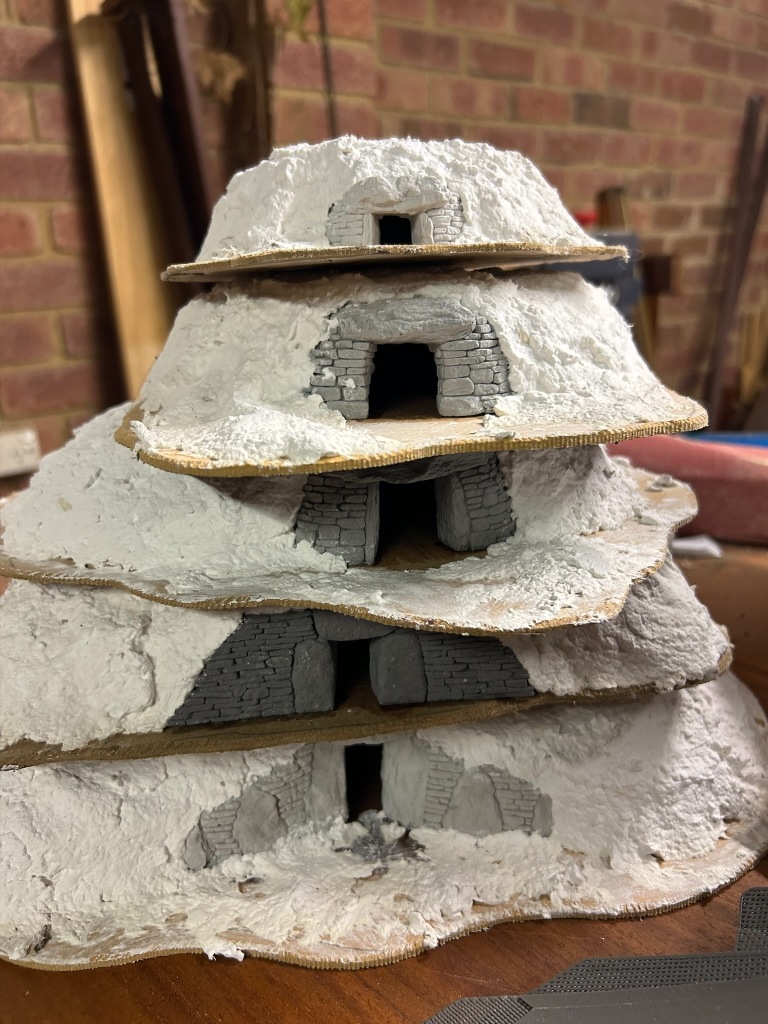
Following on from this I used Sculptamold (plaster with paper fiber mixed in) to cover the foam forms and blending in the entrances, taking care not to cover them up. This added some variation to the shapes and smoothed everything down, making them look much more like hills.

That’s it for the build side of things, now onto painting!

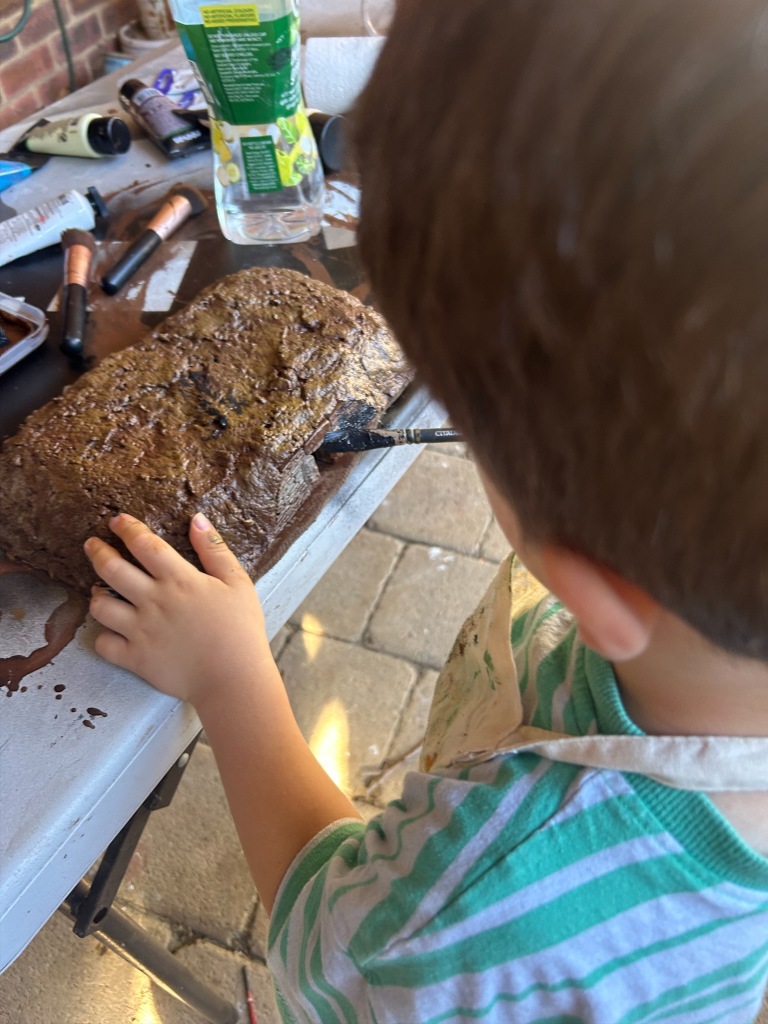
I don’t really have photos of the painting process apart from this one. I’m finding terrain has been a good fun way to get my son to join into the hobby side of things. He’s 3 and miniatures are a bit too small, but he’s fine getting some paint down on larger objects (including himself)!

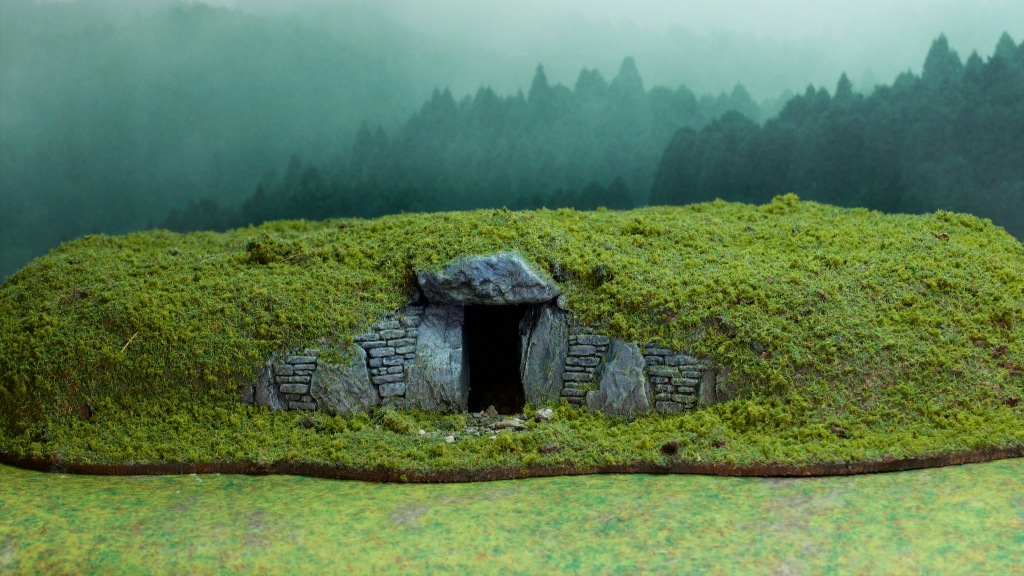
Once the base colours were down, I gave the entrances a few drybrushes of greys and some green and brown washes to add a bit of colour in there. Once that was done I covered them using the flock mix I’ve been playing with for a while, a mix of Woodland Scenics foams and GW static grass.

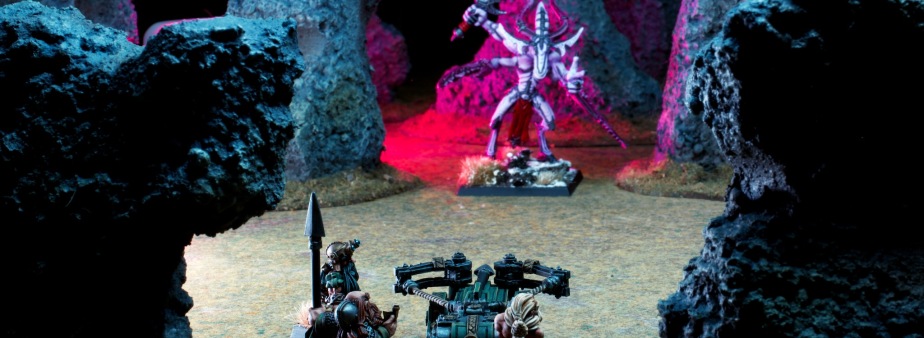
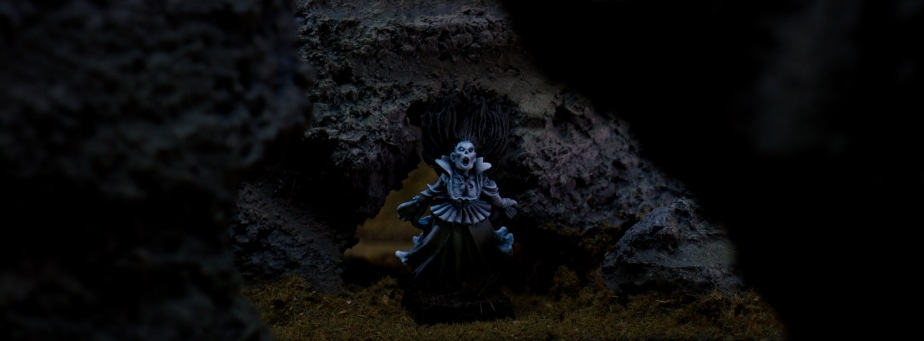
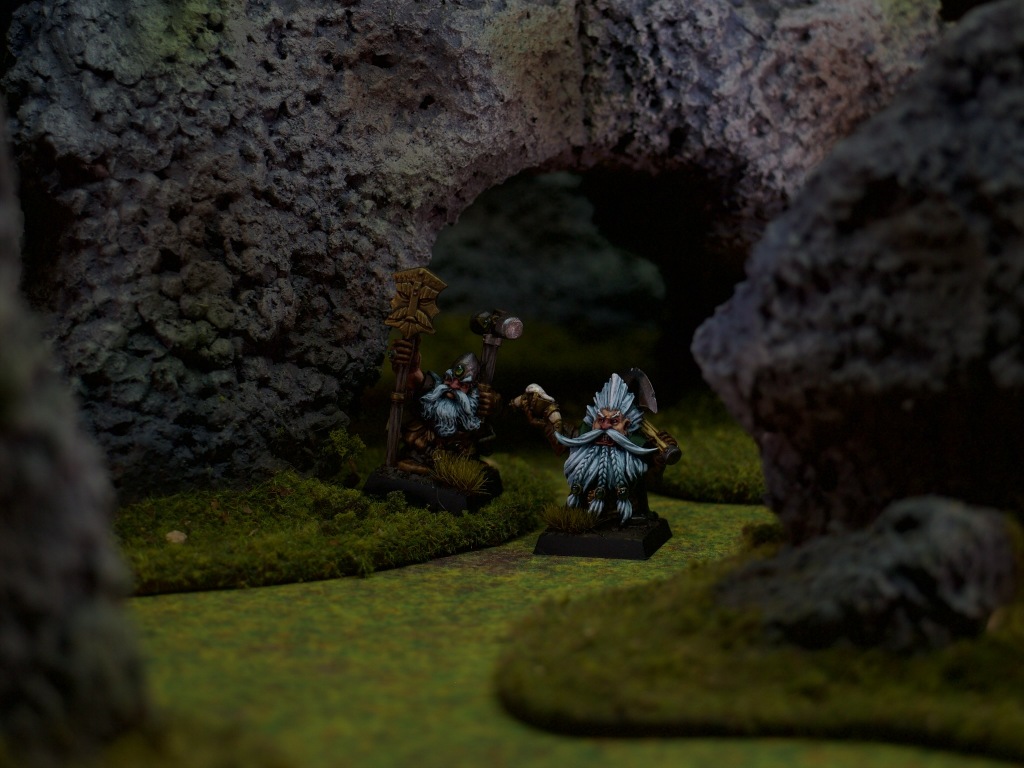
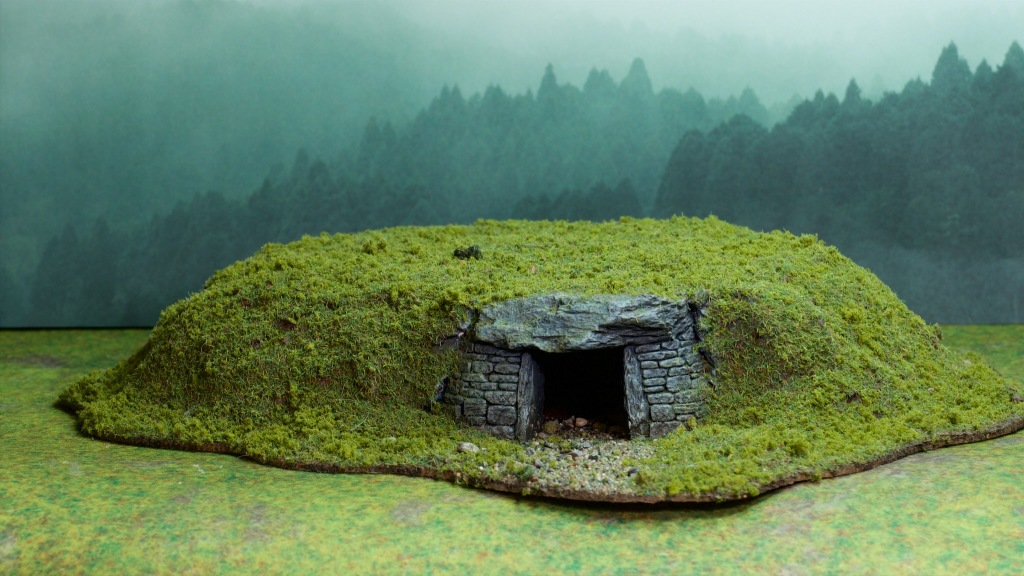
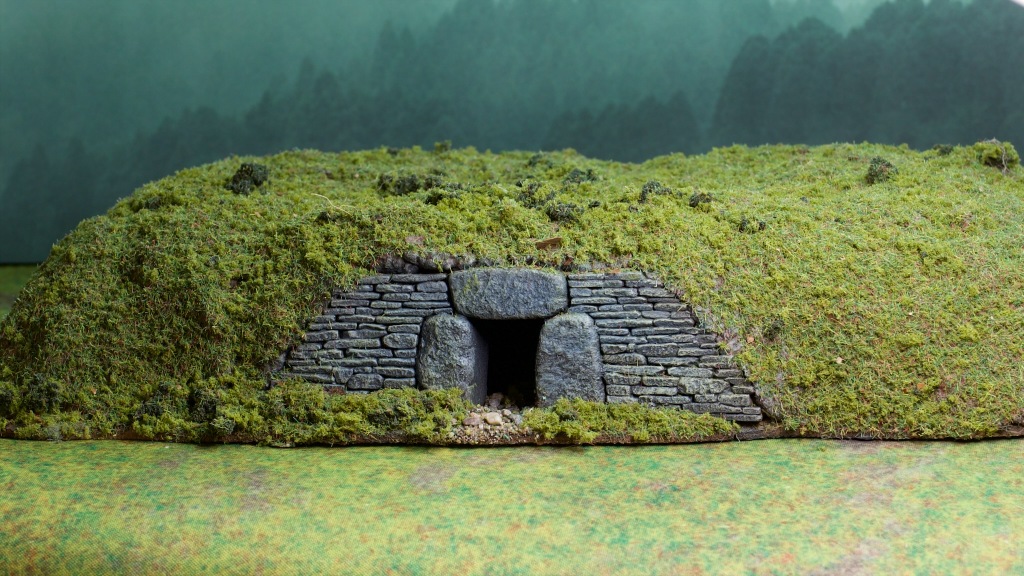
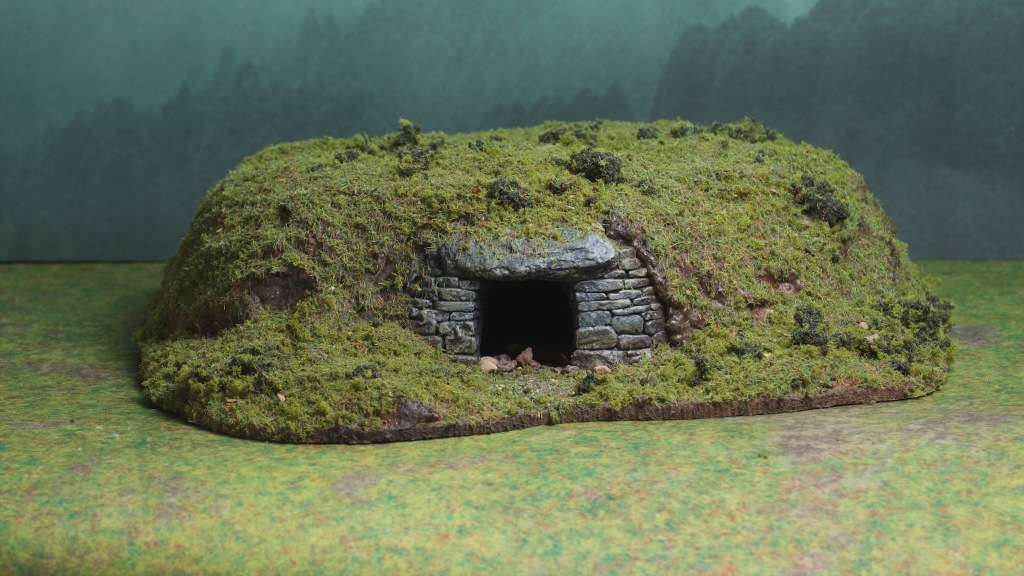
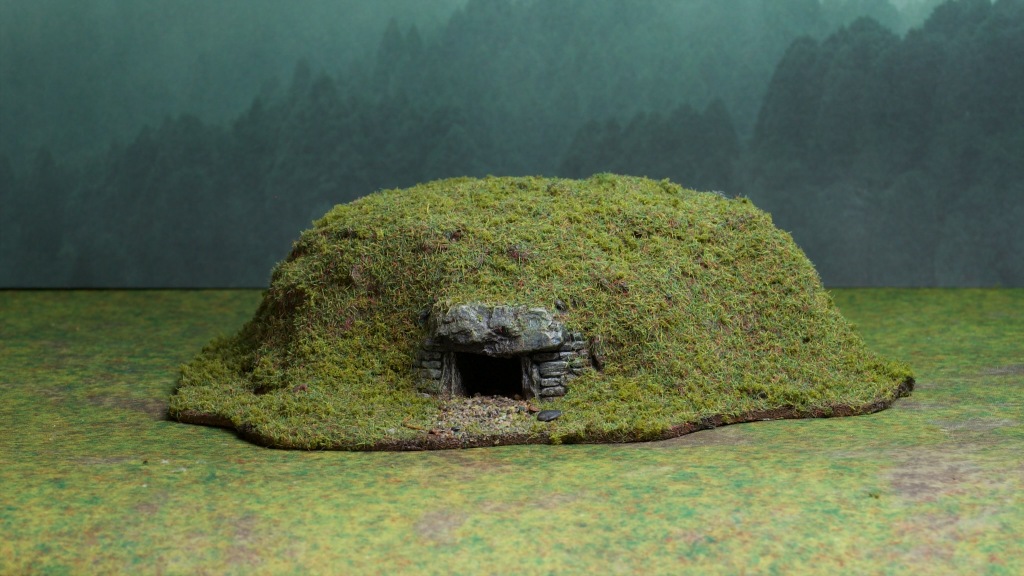
Here are the finished barrows:

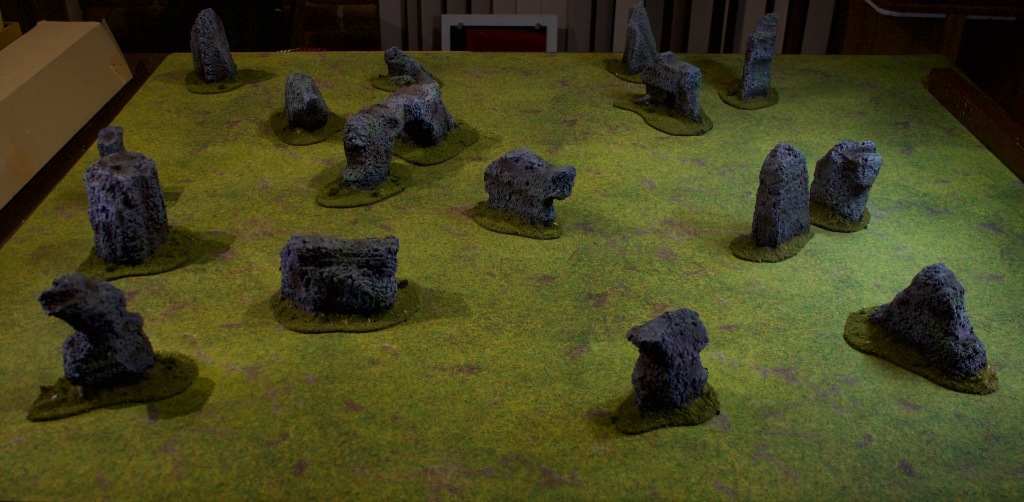
The Geistmunden Hills scenario calls for a piece of terrain to sit in the center of the board, and they suggest amongst other things a stone circle. This appealed to me, and I used some pine bark I had lying around to make an altar of sorts surrounded by standing stones. I painted these to match the stone of the barrows.

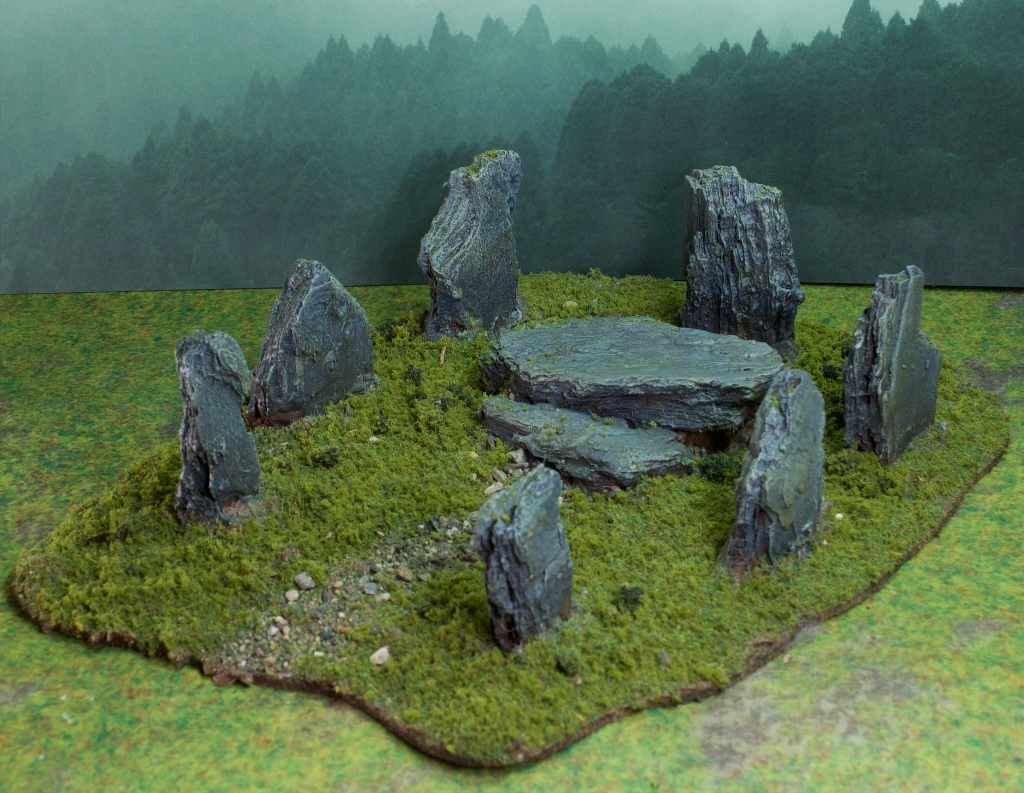
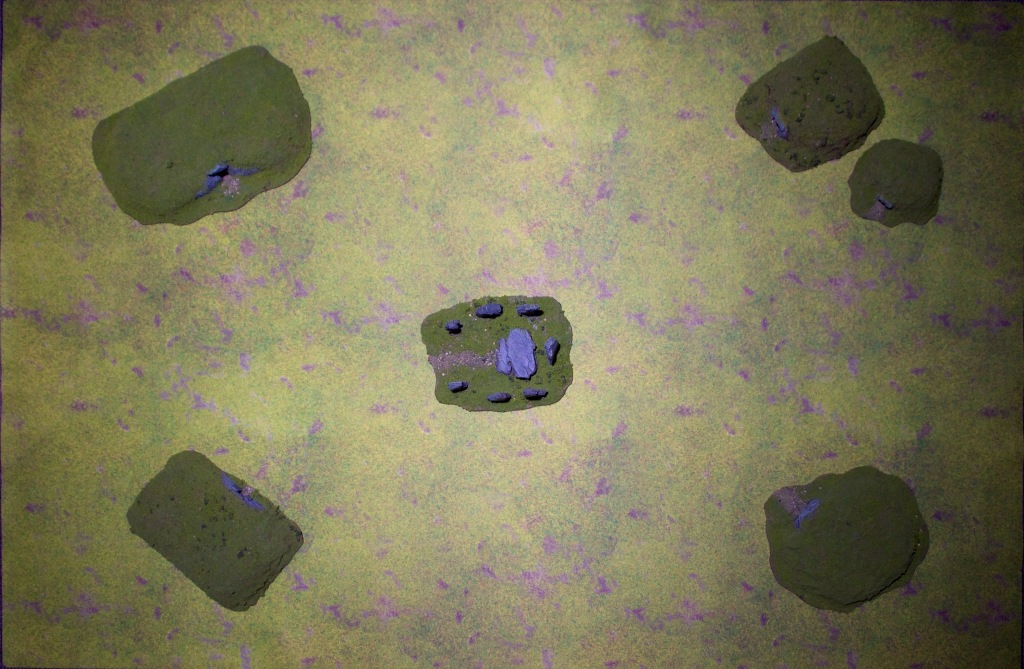
Overall here’s how these all fit on a 6ft x 4ft board:

These were lots of fun to put together, and I’m excited to use them in games. The motivation for these was this Warhammer campaign, but I can easily see using these for historicals or Middle-Earth games.

Until next time!

Dwarf Warriors

After all these diversions painting Wood Elves, I’m back in the realm of trusty axes with some more Dwarfs!

These are the old Battle for Skull Pass starter set models, which are quite basic one piece models (hence the flat poses!). The upside of this is detail on them is limited and they’re quite fast to paint.

Painting-wise there is nothing groundbreaking on these, still using the same recipe as the unit of Miners that kicked this all off. It’s quite a fast scheme and looks fine on the table!

A big part of the drive to get these models painted was to make this army legal under the newest ruleset. I was a bit light on core units, so a small block of warriors filled that void nicely.

You may notice these are on a spaced out movement tray, while my previous units were close together. The new edition of the game has dwarfs sitting on 25mm bases rather than the classic 20mm, so rather than rebasing all these, I knocked up some movement trays in tinkercad that add the missing 5mm around the models and printed them on my filament printer. I did this for all my current units, which means it’s a good time for an army photo!

Having all this painted up gives me far more than I need for the campaign which means I’m good to go on that front which is very exciting!

I should have some terrain for the campaign done up soon, so I’d expect that to be the next post!

Bolt Thrower

I’ve been on a small holiday this weekend, taking Friday off work and going up to Broome for a few days, which made for a lovely break. As an aside I really recommend going there if you ever get the chance, it’s quite an amazing location. I got back tonight and found I had the urge to get back into some painting so I finished off some reinforcements for my Dwarfs!

I’d actually started painting these a couple of weeks back and had the mostly finished by the time we left for Broome so there wasn’t much to do to get them finished up, but still nice to be able to to call them done!

This is a metal model from the range refresh Dwarfs got in late 6th edition Warhammer, which dates it to around 2005 I think. It’s a nice model, and I really like the crew although the bolt thrower itself was a bit fiddly to put together as multipart metal models tend to be.

There are some fun details on the, models such as the bolt held up by the middle crewman which has a rune from the game – Flakkson’s Rune of Seeking – carved into its tip (bonus to hit against flying creatures for those of you that are wondering!).

Painting-wise, these models are much like the rest of the Dwarf army, that is they follow the scheme I presented back in May.

It’s nice to add some more models to my Dwarf army, which I will be growing over time as I get through painting up the collection I purchased a while back. I do really enjoy painting Dwarfs, which is a good thing as I have quite a few more to paint!

The Warrens

It’s been a little while between updates, work has been rather busy and painting time has suffered as a result, but I’ve still been busy in the background! Quite a few models started over the last month, and unfortunately not many finished! Hopefully they will grace these pages soon, but for now here’s something I started this weekend and finished up early this week.

If you remember the map I drew for the Border Princes campaign, you might remember an area called “The Warrens”, that had a scattering of tall stones pictured in the area. This area has a special scenario associated with it (aptly named Rock Labyrinth!) that requires the board to be covered in rocky outcrops. This makes movement very difficult for ranked up regiments as you might imagine, and the scenario allows normally ranked units to fight in skirmish formation to ease their passage through the board.

The scenario consequently requires a great many rocks to be placed on the battlefield, many more than I had access to in my terrain collection so I decided to make up a batch for it.

These rocks are carved blocks of polystyrene, roughed up with a large wire brush and covered in homemade texture paint (mix of PVA glue, paint, sand, and bicarb soda). This texturing stage I did with my 3-year-old son who greatly enjoyed himself (He somehow got some on his back despite my best efforts to cover him with an apron!).

The goal was to have enough of these to play the Rock Labyrinth scenario on a 4ft by 4ft board, appropriate for the game size we’ll be playing during the campaign. The photo above shows them on a board of that size. It looks pretty cramped which is just right, mission accomplished there I’d say!

Turns out these rocks make for some fun backdrops for miniature photography so I couldn’t resist posing some models amongst them.

Here’s some proper dwarven terrain!

These were really fun to make, if a bit messy (I had the vacuum running while I was carving and still got polystyrene balls everywhere!). I look forward to playing some games using them, and I’m sure you’ll see them in the background of miniature shots in the near future.

Paladin

Back this time around with another character model, and in this case it’s the model that takes me to 500 points of Bretonnians! This rounds out my small defenders of Malko force, a small army that will defend the central town in our Border Princes campaign.

This model is (I think!) an old Questing Knight, which I’m using as a Paladin with the Virtue of Empathy (fights on foot with the peasants!). I really like this model and wanted to save it for last for this small force of defenders of Malko.

In my last post I showed a boar’s head on the men-at-arm’s banner, representing their lord’s heraldry. This model is said lord so he of course needed a boar’s head on his shield. I think the version I painted on his shield is an improvement over what I had on the banner which is the right way around!

Just like for the Damsel I went with a richer green for this model, to make him stand out from the peasant soldiers which have a much more earthy green. The yellow is also more saturated on him than on the other models in the army for the same reason.

As he marks a milestone for the army (and in fact all I need to paint for the campaign), it’s time for a group photo!

It’s nice to see them all together, and this now means I have the minimum I need for the campaign across the three armies (1000pts of Dwarfs and Vampire counts and the 500 points of Bretonnians). This of course doesn’t preclude me adding more to them, but now the blocker to the campaign shifts to the terrain we need for the locations on the map, so I might spend more time on terrain in the short term.

Men-at-Arms

The latest unit off the painting table is some reinforcements for the small Bretonnian garrison for Malko, the town at the center of the Border Princes campaign map.

These are a unit of Men-at-Arms, the other main peasant unit in the army, the first being the archers I painted a while back. Just like the archers, these models came from a second hand lot I got on ebay at the start of this project. Little did I know that a few months after I got these, the relaunch of Warhammer as the Old World would be announced and that if I’d waited I could have just bought new models!

If I sound a little bitter it’s because these weren’t much fun to paint to be honest! I’m pretty comfortable stripping plastic models, so had no issues with the one-piece archer models, but on these men-at-arms I encountered a different enemy: glue.

As you can see, these models are covered for the most part with large shields, and I knew I’d want to remove those for painting. The previous owner had generously doused the joints with glue and I ended up having to pry the shields off which resulted in some breakage. This left the models with some rather unsightly joins and I’d rather no one had a look too closely at the left arm on these!

The magic of ranked up models hides a lot of issues though, and while the damage dampened my enthusiasm for these, I do think they look pretty nice all ranked up. I had a great time painting the banner and the shields. For the shields I tried to paint on some basic heraldic looking patterns, with each shield being different to the others as you can see in the photos below.

For the banner I tried to free hand a heraldic boar’s head, as that’s the emblem I decided the noble leading these troops would have as his device.

On the other side of the banner I went for a sword motif to represent the men-at-arms.

I expect to have to do a lot of free handing when I get to painting some knights so this is great practice!

There you have it! While the process wasn’t the most fun, I am happy with how these look and glad to be that much closer to the goal of 500 points for these Bretonnians!

Grombrindal, the White Dwarf

Small update again this week, with another model for my dwarfs! This time we have the White Dwarf himself, Grombrindal!

This is a pretty fun model, with his helmet serving as an impromptu ale flask, and quite the expression fixed on his face. This is one of the many Grombrindal models released over the years, of which I have a couple more. This one is one of the more useable in regular games of Warhammer however, being a single model on foot rather than a mini scene. I’ll use him as a Thane in the campaign games, and will have to look around see if they ever made any rules to represent the actual character in games!

I’d never seen the back of this model before and the large mullet I found there was quite the discovery!

This was a bit of a speed paint as it was done over the course of a single day, but I’m pretty happy with how he turned out and he’s happily sitting next to the rest of my dwarfs in the cabinet.

I’ve now had a nice little break from blocks of infantry, with the last few posts focussing on terrain and characters, but break over and I’m back to painting ranked models!

A Damsel

Back relatively quickly this time with some more progress for the Border Princes campaign in the form of a character model (hence the speedy update!).

This model is a classic Brettonian Damsel model, one of my favourite Warhammer models ever, and I loved painting it. This sculpt is very detailed and fine, and after admiring it in the pages of Games Workshop publications for so many years it was a pleasure to see it in person.

When I started painting it I quickly gravitated towards this red hair/green dress combo, having pictured Merida from the animated movie Brave and deciding that would be a good look for this model.

I tried to take special care around the face, having found my usual face army painting process resulting in rather rough masculine faces that would not suit this model. I ended up working my way down rather than up as I would usually do. I started with GW’s Kislev Flesh as a base coat (this is my usual final highlight for caucasian skin tones), and glazed reds in she shadows and on the cheeks to shade and give a bit of life to the model. I used Vallejo Scarlet Red and GW Contrast Volupus Pink in turn, both very watered down for some very thin glazing.

The rest of the model was done much faster, with the hair done with a mix of red and yellow GW contrast paints to start with and then layered with regular acrylics (to the extent that almost none of the contrast shows through).

For the dress I wanted a slightly satiny look, so I highlighted my green basecoat by mixing in some pale blue a couple of times and placed some fairly harsh highlights to give that shiny material look.

Overall given the time taken I’m very happy with the result!

Another small piece of additional work went into printing and painting up some movement trays for my painted dwarfs units, which you can see below:

Three Years Already!

September marks three years since I’ve started this blog (which feels crazy to me, can hardly believe it’s been that long). This post will also mark 120 posts on the blog which is not bad going!

To celebrate and mark the occasion I decided that my trusty header that had served me well all this time needed an overhaul.

Out with the old…

I spent some time this afternoon putting together a collection of stuff I though looked neat and photographing it to use as a backdrop for the header. I then set about sorting out the text, and ended up with something that definitely has a Stranger Things crossed with Warhammer vibe, but there are worse influences out there!

…and in with the new!

I’ve also decided to make this a little bit more official and finally get a proper domain for the blog: http://lairofthelagomorph.com. I’m treating this as a bit of a reward for myself for having stuck to this blogging thing for 3 years, here’s to many more!

The Chapel and Watchtower

Between Baldur’s Gate 3 sessions I’ve been doing some more terrain painting for Warhammer. This time around a couple of kits that came out a few years before last post’s Skullvane Manse: an Empire chapel and watchtower. These two also came out as a combined kit where extra parts liked them together into one bigger building, but I don’t own that variant!

These are both great models and I was pretty chuffed when a friend gave me his seeing as I never picked them up when they were still being sold by GW. Just like the Skullvane Manse I took my time painting these hence the 3ish week gap between posts (the aforementioned Baldur’s Gate 3 sessions did not help!).

I think the results are worth it though, and I’m excited to put these on the table! Here’s some 360° shots of the buildings.

Had some fun adding gloss varnish to the windows, I think that worked pretty well
Wouldn’t be a proper Warhammer building if it didn’t have skulls all over!
I felt bad oxidising that clock, but the mechanisms are all exposed, what else could I do!
I picked out a few tiles in a darker brown and a few in a lighter terracotta to add a bit of variation.
The lower stone areas got the green enamel wash treatment to get that mossy/licheny feel.
The copper oxidisation is done with Games Workshop’s Nihilakh Oxide, slightly watered down.
The skeleton enshrined in the wall is quite small, I choose to believe it must have belonged to some sanctified halfling.
The variations in tones on the cream sections of the wall are a result of first airbrushing Vallejo Desert Yellow over the undercoat colour, then washing it with a brown wash, and highlighting it with some very thin (a glaze effectively) Vallejo Desert Yellow. The wash left some great grimy patterns all over the walls of both buildings which was a pleasant surprise!

I hope you’ve enjoyed these! I’m not too sure what I’ll be painting next but I think it’ll be models rather than terrain. Time will tell!

Skullvane Manse

After painting quite a few models for our Border Princes campaign, and a good chat in the comments of fellow blogger Kuribo’s latest post, I decided to get some terrain done. I wanted this terrain to contribute towards the campaign, so painted an old (well not so old!) Warhammer terrain kit: Skullvane Manse, also known as Warscryer Citadel in its Age of Sigmar re-release. For the campaign, it will be used for battles fought around the town of Aldium, which is home to many wizardy types that like to do their research far from the gaze of imperial witch hunters!

It is quite a fun model, with a ton of detail. The rickety tower reminds me of the tower Merlin is given in the old Disney movie The Sword in the Stone for those that remember that! With its giant telescope it seems like an excellent home to a wizard. It is covered in Empire iconography, but you have to fool witch hunters somehow!

This model is very tall, and was a bit of a challenge to paint as a result. The only sub-assembly I did was to keep the telescope cupola separate, and I kept the rest of the model in one piece which was definitely a mistake. This made the painting process much more complicated, as I had to wield this big model while trying to get to many hard to reach places.

I did have a lot of fun painting it however, it is just covered in fun details, and while I was initially going to paint it to my normal terrain standard, I ended up putting quite a bit of time into this model.

This model has a lot of stone on it, and one thing I did to break all that up was to make the natural rock a blue grey, and the artificial stonework a more desaturated grey. I don’t think that came through in the photos that well however, but in person it’s pretty visible.

Another bit of experimenting I did was with the telescope’s lens. I painted the lens as I would any other, but then instead of gloss varnish to finish it off, I filled the hollow part with UV Resin, and cured it in place. This gives a pretty fun effect in person, hard to capture in photos but I’ll let you imagine it. The UV resin is 2-3mm thick above the painted area, so the depth really adds a lens-like quality to it,

To give you a sense of the scale of this model, and showcase some detail not captured in the photos above here are some more photos with models included.

Anyway I hope you enjoyed that model! I’m not sure what’s headed to the painting table next, but given how much fun I had painting this I could well see more terrain on its way soon!